Outlook For Mac 365 Create Pst File
Microsoft Outlook Data Files, also known as.pst (PST) file types, present many challenges, especially in corporate environments. Common issues with managing PST files include: • difficulty managing eDiscovery and backup maintenance • data corruption and network access optimization • compliance and security issues with data access – just to list a few of their many drawbacks. As a result, most organizations recognize the importance of addressing these challenges. Must have apps for macbook pro. Moving the data contained in PSTs into Exchange, whether it is the user’s primary mailbox or an archive mailbox, is a common strategy to avoid these issues.
For organizations that have moved email to Office 365 or are planning on doing so, Microsoft now offers the Office 365 Import Service to help accomplish this task. Here is some important information that walks through the process of uploading and importing PST files to mailboxes in Office 365 using the Import Service. Step 1: Accessing the Import Service The Import Service can be accessed from the Office 365 Admin Center by clicking on the “Import” link in the left hand pane.
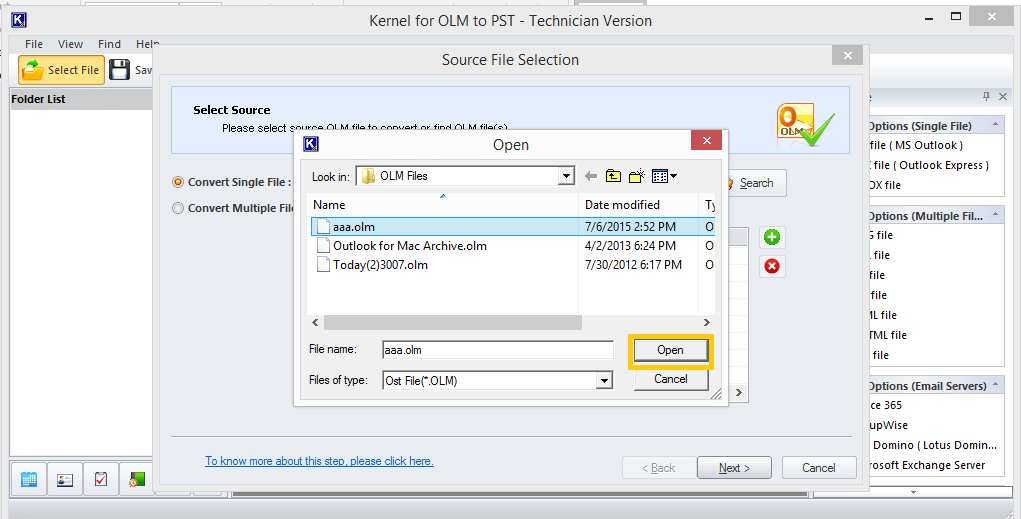
Summary: Microsoft Outlook email client can be used on both Windows and Mac, however, both platforms store mailbox data in different kinds of data files. While on Mac, Outlook data is stored within OLM files and on Windows, it is stored within PST files. Here, we identify several reasons why users may wish to convert OLM file to PST format.
If you click on the plus sign in the middle pane, you will notice two options: “Ship data on physical hard drives” or “Upload files over the network.” For the purposes of this blog, I will focus on uploading files over the network, but as you can see, it is now possible to load up a hard drive with data and send it to Microsoft. Step 2: Prepare for the Upload and Import of PSTs After clicking on “Upload files over the network,” you are presented with the page below: Let’s start by clicking on the “Download tool” link in order to download and install Azure AzCopy, which is the command line tool we will use to upload the data (PST files in this case) to Azure. Next, we can move on to the next two links as seen in the screenshot above.
These two links (“Show key” and “Show URL”) will display the security key and the URL that we will use with our AzCopy command in order to upload the PST files to Azure. The key and the URL displayed will look like the following (please note that these are just examples and not valid): Key RnUyjMMaLuI5xPzfivWlpxrPlTFqMoYvtpvYdXa6fTAMuJydcTkG4oPeP/Yoo7tjpYwQme OrRmMpx/TqM== URL We are now ready to upload our data. For the purposes of this demonstration, I have placed three PST files in the following network share: server20 psts. Next, let’s put together the command we will use with AzCopy. I prefer to do this in Notepad and then paste it into the command window. Below is the command I used: azCopy.exe /source: server20 psts /Dest:/Destkey: RnUyjMMaLuI5xPzfivWlpxrPlTFqMoYvtpvYdXa6fTAMuJydcTkG4oPeP/Yoo7tjpYwQme OrRmMpx/TqM== /V:C: temp pstUpload.log Let’s break down the above command: • /source: This is simply the location where the PST files to be uploaded are located • /Dest: Here we use the URL that was displayed when we clicked on the “Show URL” link above. In addition, I have also appended /server20/psts/ to the URL which is the source path ( server20 psts) converted into “Friendly Path.” This last section of the URL will be important when we put together our PST to User mapping file later on • /Destkey: The secure storage account key displayed when clicking on the “Show key” link above • /V: Specifies verbose logging and the location for the log file We can now start AzCopy (Microsoft Azure Storage command line) and execute the command above.