How To Setup A Vpn Connection For A Mac
The Virtual Private Network (VPN) is a prominent mode to keep you secure and anonymous over the internet with the help of your computer or similar Setup VPN on MacOS 10.5.x. To configure a VPN connection from a Mac OSX10.5 client computer you need to go through the below mentioned steps.
Setting up a Virtual Private Networking connection on a Mac is easy and straight forward. In the following steps I’ll show you how to set up a VPN connection on your Mac. Pokemon crystal for gba emulator. Choosing A VPN Service In order to use a VPN service, you need an active VPN account. If you already have an active VPN account skip this section and continue reading from “Setting Up a VPN Connection”. When choosing a VPN service, avoid the “Free” options because they are slow, limited in bandwidth, and loaded with advertisements. Instead, select an inexpensive VPN service such as HideMyAss (HMA). I use the HMA service because it is easy to use and offers excellent value (I can use it on my iPhone and iMac at the same time without paying more, for example).
HideMyAss’s logging policy doesn’t bother me because I mainly use it to watch U.S. There many VPN providers other than HideMyAss you can consider as well, such as. However, make sure you choose a VPN service that offers many servers in different countries, and that isn’t too expensive. For a list of leading VPN service providers, visit. Choose “VPN” from the “Interface” select box • Choose “VPN” under “Interface”, and type in a name in the “Service Name” text box. Under VPN Type, choose the VPN type (protocol) your provider assigned to you. The most common VPN protocol is “PPTP”.
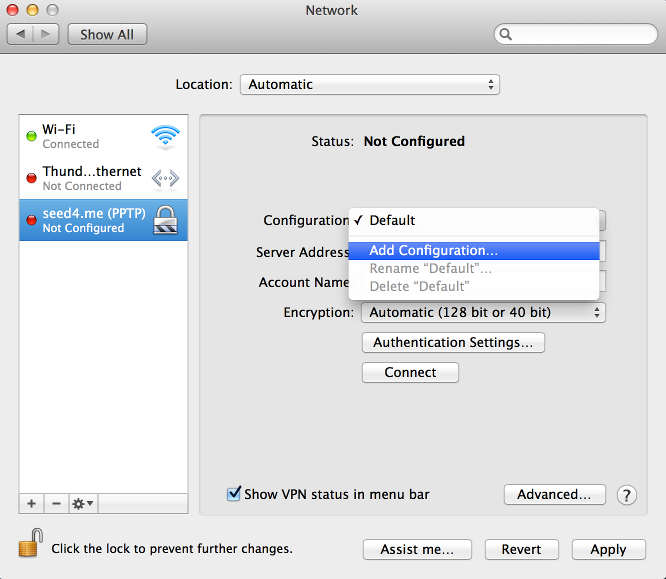
Windows, Mac, and Linux all have built-in native support for PPTP. The biggest benefit of using PPTP is you don’t have to download additional drivers to set it up. In my case, I use “PPTP” which is what HideMyAss VPN supports. Finally, click “Create”. • You should see a screen like the following: In the “Server Address” field enter the address of the VPN server, then click “Connect”. • The “VPN Connection” window will appear.
Enter the username and password your VPN provider assigned to you and then click “OK”. • In the “Network” window, choose the VPN service you just created on the left and click the “Advanced” button. In the Advanced window make sure “Send all traffic over VPN connection” is checked. You have successfully setup a VPN connection on your Mac. Next, you may want to consider as well.
Image Credit. Word for apple mac.
This week we’re going to take a look at setting up the Server app’s VPN service, which you can use to gain secure access to your private network on the public Internet. The acronym VPN stands for Virtual Private Network, and VPNs allow users to be anywhere in the world and create a secure connection to private networks. VPNs secure your data using data encryption and tunneling, If you want more information on how VPNs work,, but in simplest terms, using a VPN is like connecting a very long ethernet cable from a computer anywhere in the world to your private network. VPN and the Server app If you have Apple’s Server app, you have access to an excellent VPN server that’s simple to set up and easy to use. Before you begin configuring your server, let’s take a look at the configuration settings for Server’s VPN service.